In this tutorial, you’ll learn how to use Jira Automation to create auto-incrementing revision numbers, so that you can implement compliant workflows on your requirements, tests, and any other documentation you maintain in Jira. Personally, I like adding this feature to any workflow where a Jira issue can be reopened after it has be closed and approved.
Configuration Steps
Note: These instructions are written for company-managed projects. Currently, team-managed projects do not support the read-only text fields used in these configurations.
Custom Field
Create a custom field for your revision number:
- Go to Settings –> Issues –> Custom fields.
- Select Create custom field.
- Select Advanced –> Text Field (read only).
- Press Next.
- Name the field: Revision Number
- (Optional) Provide a field description.
- Press Create.
- Select the issue types screens where this field should be displayed.
- Press Update.
Configuring Jira Automation
- Navigate to your project.
- Go to Project Settings –> Automation.
(Note: If you have Jira Premium, you can go to Settings –> System –> Global Automation.)
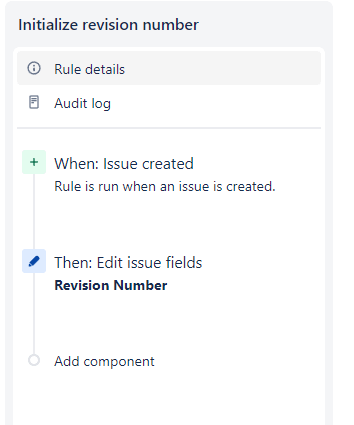
Configure Rule — Initialize Revision Number
- Select Create rule.
- Under New Trigger, select Issue created.
- Press Save.
- Select to add a New action.
- Under New Action, select Edit issue.
- Select to edit the following field.
- Field: Revision Number
- Value: 1
- Press Save.
- Provide a name for your new automation. For example, “Initialize Revision Number“.
- Press Turn in on.
- Select Return to list.
Here’s an example of the completed initialization rule:
Using Jira in a heavily regulated industry?
Get my list of 7 essential Jira Cloud apps for building a compliant SDLC in regulated industries.
Configure Rules — Set Reviewers
- Select Create rule.
- Under New Trigger, select Issue transitioned.
- Configure the From status to be “Approved” (or whatever your closed status is), and the To status to be “Draft“, “In Progress“, etc. (whatever your reopened statuses are).
- Press Save.
- Select to add a New condition.
- Under New condition, select lf / else block.
- Configure the If block:
- Run actions if: All conditions match
- Condition:
- Issue fields condition
- Field: Revision Number
- Condition: is empty.
- Issue fields condition
- Press Save.
- Select to add a New action to the If block.
- Under New Action, select Edit issue.
- Select to edit the following field.
- Field: Revision Number
- Value: 2
- Press Save.
- Select to add a New action to the else block.
- Under New Action, select Edit issue.
- Select to edit the following field.
- Field: Revision Number
- Value (learn more):
{{#=}}{{issue.Revision Number}} + 1{{/}}
- Press Save.
- Provide a name for your new automation. For example, “Increment Revision Number“.
- Press Turn in on.
- Select Return to list.
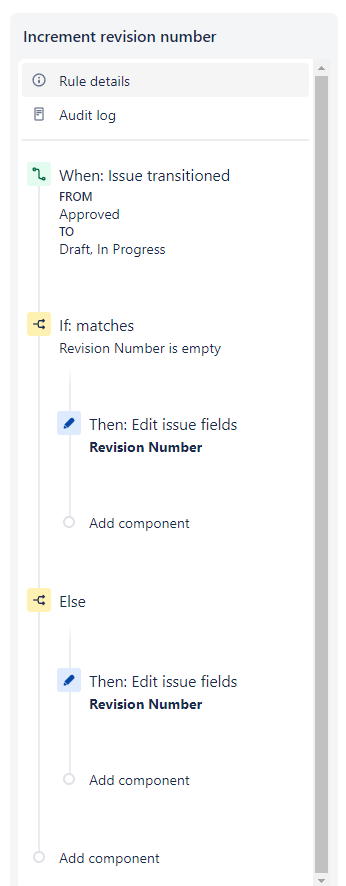
Here’s an example of a completed increment rule:
Using Jira in a heavily regulated industry?
Get my list of 7 essential Jira Cloud apps for building a compliant SDLC in regulated industries.
Related Tutorials
- Creating Workflow-based Approvals using Jira Automation
- Building a review process with Jira Automation
More Information
Find more strategies like this in my Quick Start Guide for Jira Cloud: https://www.agile-innovations.tech/part-11
For more information about Jira automation, checkout Atlassian’s documentation: